Craft and Connect: Shaving Cream Paint
Get super creative with this three-dimensional paint that stays exactly where you put it.
This is what you’ll need:
- Colored construction paper
- Shaving cream
- White glue
- Small cups for mixing the paint mixture
- Painting tools – paint brushes, craft sticks, combs, spoons, etc.
- Glitter
Step 1 – Prepare the Shaving Cream Paint
Mix shaving cream and white glue. Most recipes say to mix equal parts of each, but we squirted shaving cream into cups and added just a dollop of glue, and the painting worked just fine.
Connect: Have your child help squirt the shaving cream into the cup. He or she will enjoy having control of this part of the project.
Step 2 – Paint
Using your painting tools, make a design on the paper.
Connect: Talk about how the paint looks and feels. If it’s thick and it doesn’t pour easily have your child use different motions to get the paint out of the cup. Try turning the cup upside down. Try scooping out the paint and tapping it on the paper.
Step 3 – Get Creative!
Four year olds are much more creative than we adults are. It was my son’s idea to draw cupcakes and add the paint as icing, decorating it with sprinkles (glitter).
Connect: Be receptive to your child’s ideas. This paint holds glitter well. You could also make a snowman and add small objects, like toothpicks, jewels, and buttons. Ask your child “What can we make with this paint?” Make it your goal to say yes to whatever your child suggests.
Product Recommendations from Discount School Supply®:
Colorations® Construction Paper Smart Pack – 600 Sheets
Colorations® Washable School Glue
Colorations® Craft Cups – Set of 100
Colorations® Easy-Grip Paint Brushes – Set of 10
Natural Craft Stick Classroom Pack – 1200 Pieces
Colorations® Easy Shake Glitter – Set of 12
Sparkling Flower Jewels – 300 Pieces
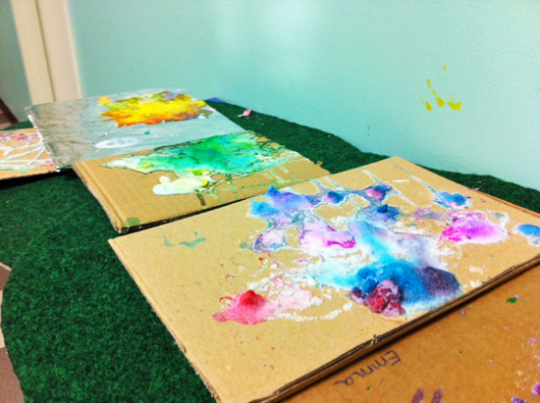
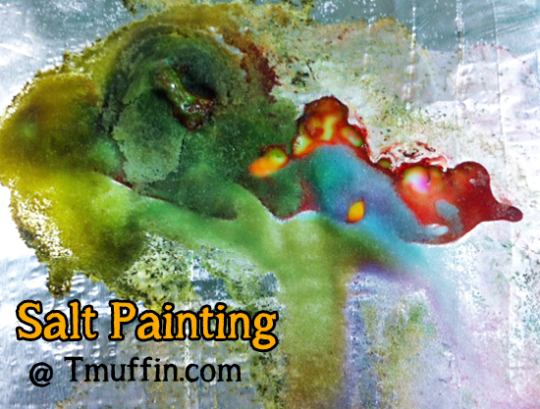
Activity Hour: Salt Painting
This activity combines art with experimentation and gross motor skills to satisfy even the kid who won’t sit still for anything.
What You’ll Need:
- Tray
- Cardboard (paper is too flimsy for this project)
- 1.25 oz glue container
- Salt in a shaker
- Liquid watercolors
- Eye droppers
- Spill-proof containers
- Aluminum foil (optional—use this to cover the cardboard for a unique project surface)
Step 1 – Draw with glue
Put the cardboard on a tray to contain any stray glue, salt, or liquid watercolor. Give your child the glue and ask him or her to “draw” with it. Allow the child to squeeze as much glue out as he wants—we’ll need a lot of glue for this project.
*Tips for Parents: Show your child how to squeeze the glue in different ways. Hold the glue bottle up high while squeezing. Now hold it down low. Move it around quickly, then slowly. Your child can use big or small movements to get the glue on the surface.
Step 2 – Shake, shake, shake!
Have your child shake salt all over the glue. The glue will need to be completely covered with salt.
*Tips for Parents: If salt comes out of the shaker too quickly, tape up some of the holes. If it comes out too slowly, cut some more holes. If your child shakes a little salt out and then is finished, encourage him or her to continue by singing and shaking to the rhythm. Explain that all the shiny glue needs to be covered by salt.
Step 3 – Add color
Add some water to the liquid watercolors in several spill-proof containers (one for each color). Have your child use an eye dropper to transfer liquid watercolor to the salt on his or her artwork.
*Tips for parents: Point out how the salt sucks up the color and makes it appear to move magically through the salty surface. Let your child use as much color as he or she wants—you can always gently pat a paper towel on top of the entire project to soak up the extras.
Product Recommendations from Discount School Supply®:
Brawny Tough Plastic Art Trays – Set of 5
Colorations® Washable School Glue – 1.25 oz
Colorations® Classic Colors Liquid Watercolor Paints, 8 oz. – Set of 13


